How to add parts to a kit using Excel import
This article describes how to add parts to a kit using Excel import.
Instructions
Follow the below steps to import parts to create kits.
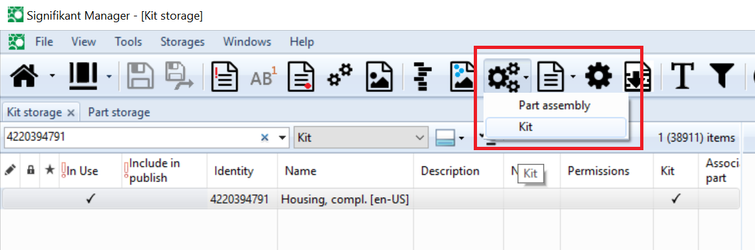
- Create an import configuration to add parts to kit. See Import using Excel, section on Add to kit.
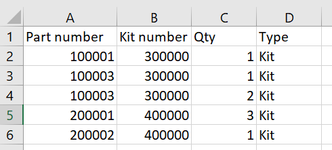
- Create a template in Excel containing the columns needed to import parts to kits. A sample Excel sheet may look like below. In this case two kits will be created containing three and two parts.
- Open Manager and open the part storage.
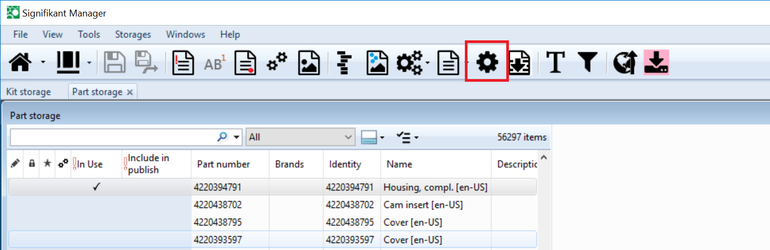
- Select to import parts. Ensure to select the correct config file and action on duplicate as Update.
Important! Select Update as action on duplicate.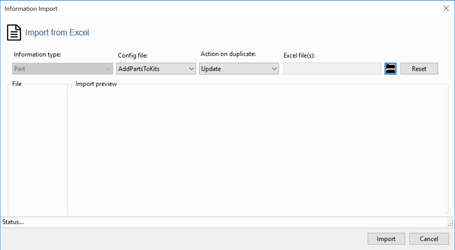
- Select the file to import and press import.
Now the parts in the Excel file will be added to the Kit in the Excel file. If any part or kit is missing, that part or kit will be created during the import. Created parts and kits will only get the values that exist in the Excel file.
Important
Do not add, move or remove columns in the Excel sheet without changing the corresponding configuration. This will confuse the importer and may corrupt data.
When importing, select Update as action on duplicate.
Presentation type
If type is added to the configuration, kits will be created with that presentation type. If the presentation type does not exist at import, the presentation type will be added. The created kits will be available in the new storage.
Important - persistent id
Related articles